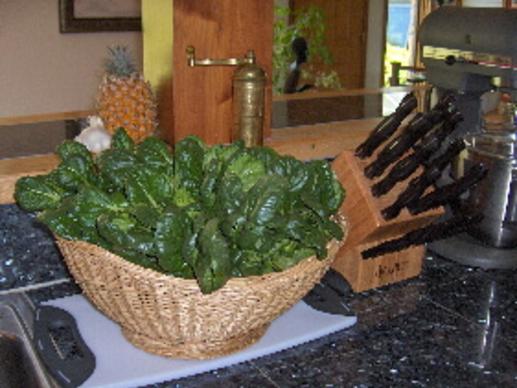
MY PROCEDURE FOR WASHING CHOI & CHING CHANG
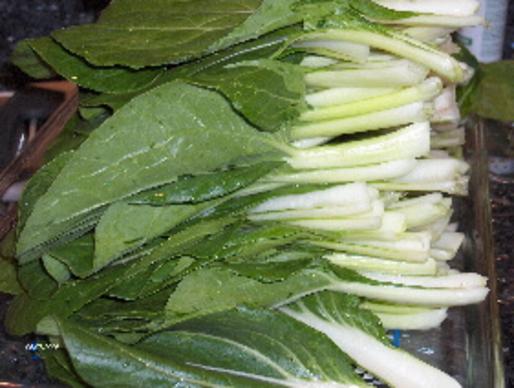
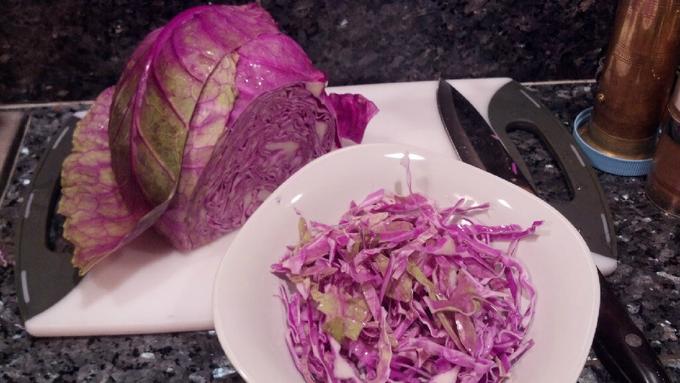
First I put on my favorite music in order to make this an enjoyable experience vs. a chore! I use a sharp knife to cut off the bottom 1/2 inch. This part of the stalk holds the most soil—it was growing in the ground after all. Then I rinse off these butt ends under running water to remove as much of the remaining soil as possible. I place these leaves on a tray or in the second sink.
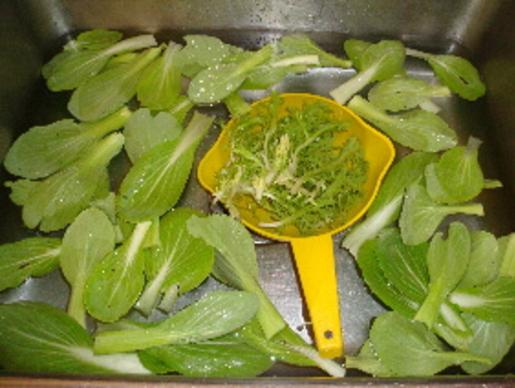
When all of the bottoms are removed, I place the greens in the sink and fill it with cold water. No additives, just cold water. I swish them around a bit and let them set a few minutes. Then I remove the greens to a tray and inspect the water to see how many slugs, worms, etc. I have washed away. They will fall to the bottom from the shock of cold water!
Repeat the swishing and soaking a second time. Repeat a third time. IF the water is clean enough to satisfy me at this point, I bag the greens or prepare my meal.
Certain greens will wilt very quickly after being harvested. Soaking the leaves in cold water will help to revive slightly wilted greens.
When cutting, try to line up the stems into manageable stacks to make them easier to dice. And while they are stacked, it is easy to make one or two horizontal cuts down the middle of the leaves and then slice into ribbons of desired width from the other direction to make bite-size pieces.
Or, use a Chiffonade is a French slicing technique whereby herbs (think basil) or green leafy vegetables (think turnip greens or jois) are cut into long, thin strips. Do this by stacking leaves, rolling them tightly, then cutting across the rolled leaves with a knife, producing fine strips.
And you will come with some creative ideas for washing more than one veggie/green at a time. For example, here is how I keep my endive together in the wash water!
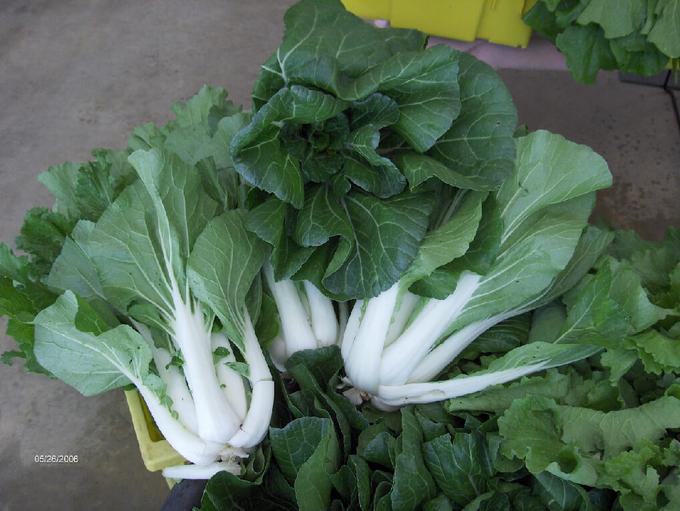
THE CHOI FAMILY
Choi or Bok Choi or Bok Choy is an Asian vegetable which is quite common in European cooking. Ching Chang is another smaller relative. Wash thoroughly and keep refrigerated in a Jumbo Hefty 2.5 gallon zip bag to provide humidity. Choi can be braised, stir-fried, steamed, or eaten raw as a salad. The white of the stalks can be mixed into the salad or put onto a raw veggie platter or use it as a celery substitute in salads. Wash well first. Then, chop the leaves into wider strips and the stalks into smaller pieces if braising as they are thicker and will take longer to cook.
To Braise:
Heat 1 cup (more or less depending on the amount being cooked) of chicken or vegetable broth in a large pan and add chopped leaves and a dash of garlic powder (or nutmeg!). Cover and simmer on low heat for 8 to 12 minutes, depending on the amount in your pan, the size of the pieces and your own preference!
To Stir-fry:
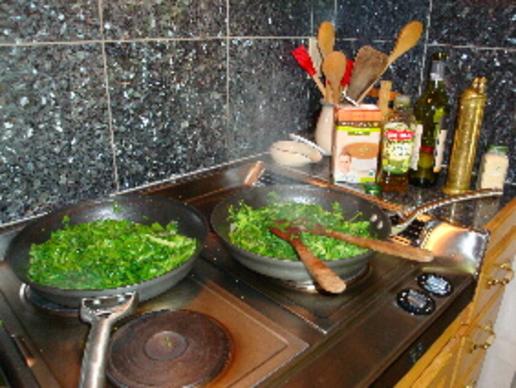
Heat 1 tbsp Olive Oil (or a garlic flavored oil) in a large pan or wok and cook over high heat for 2 minutes, or longer depending on amount of greens being cooked. Add soy sauce or rice wine vinegar to taste. Chopped asparagus, bell peppers or onions are good in this stir-fry as well.
FYI: All of these greens freeze well. Just cook until they are heated through and put into a freezer bag for a taste of Spring next winter!
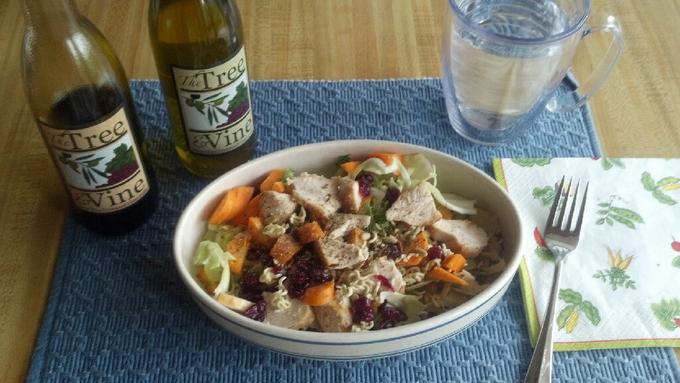
SPRING GREENS SALAD
Use any variety of Choi or Ching Chang or Tatsoi, plus Arugula, Baby Turnip Greens, Broccoli Rabe. All of the greens can be mixed and eaten raw. SEE PHOTO ALBUM FOR VEGGIE ID ASSISTANCE.
Wash the stems and leaves and chopped to desired size. Add chopped purple onions, if desired. Put mixture into a large bowl and refrigerate.
THE CRUNCHY TOPPING:
1 5-oz. package of Japanese Curly Noodles (or 3-oz. package of ramen noodle soup mix without the seasoning packet!)
3/4 cup sunflower kernels
1/4 cup sliced almonds
Crumble the noodles onto a cookie sheet. Add the sunflower seeds and almonds. Bake at 350 degrees for 5 minutes until golden brown. Set aside.
THE DRESSING:
Over medium heat, bring the following to a boil:
1/2 cup sugar (or honey or maple syrup)
1/4 cup Olive Oil
1/4 cup Balsamic Vinegar
2 TBSP Soy Sauce
Drizzle dressing over salad and add the crunchy topping. Toss and serve immediately!
In our household we make this topping and dressing in a volume of times four (x 4) so as to have it available for about two weeks before making them again. Of course, the topping is not hot this way; but no one seems to care!
FYI: The olive oil must reach room temperature before you can pour it if the dressing has been refrigerated, so allow time for this!
IF ever you feel the greens are getting to be more than you can eat and you do not want to freeze any for later, then try making a smoothie. The leaves will disappear into a tasty treat! You will be surprised at who will drink a smoothie when they would not touch raw greens!
CHOI SMOOTHIE
2 cups Choi, or greens variety
2 cups Coconut Water
1/2 Fresh Pineapple, cut off the brown skin (but include the pineapple’s core for enzymes)
2 Bananas
1/4 Lime, with the peel
1 cup Frozen Mango or other sweet fruit
CABBAGE PANCAKES
1 – 1 ¼ pounds of shredded green cabbage
2 eggs
½ cup milk
1 cup whole wheat flour
3 TBSP butter, melted
½ tsp salt
1 – 2 TBSP chopped onion
Chopped fresh dill, to taste (1 – 3 TBSP)
Blanch the shredded cabbage in boiling salt water for five minutes. Immediately plunge into cold water until cool. Drain, press out the excess water, and place into a large bowl.
Put the eggs, milk, flour, melted butter and salt into a blender and blend. When smooth, combine with the cabbage. Stir in the onions and dill.
Melt some Smart Balance in a large skillet over medium heat. Spoon the batter for each pancake into skillet. Cook until golden brown on both sides.
Serve with sour cream or syrup.
CARROT PANCAKES
While we are on the subject of pancakes, we all have heard about adding blueberries or strawberries to our pancake batter, but what about peeled and coarsely shredded carrots? Or even a shredded zucchini for that matter!
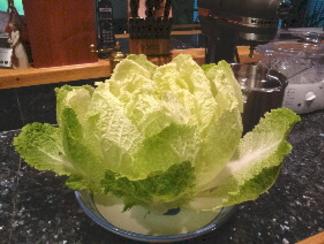
NAPA CABBAGE SALAD AND MORE . . .
You can do a lot with a head of Napa Cabbage! I often use the top greener leaves for a salad and the bottom whiter leaves in a stir fry or braise . . . First remove the hard center if there is one. Wash the leaves under running water. The oblong heads are usually clean enough you can leave them attached at the bottom for washing.
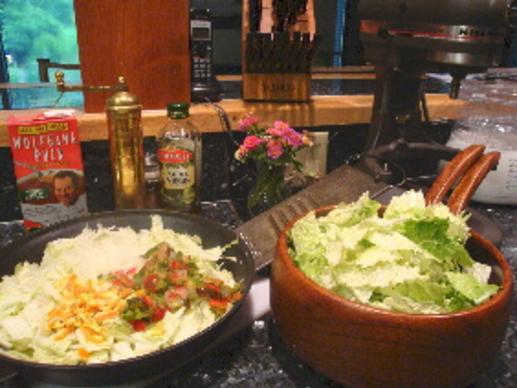
Next, chop the top part off and put in a salad bowl (or a zip bag if you are saving it for another day). Then, slice the bottom part for your braise. You will end with a small inside core all attached and ready for the compost.

& leaves used for a salad
Chop the Napa cabbage center and add ingredients to your braise and start cooking! I sometimes add colorful bell pepper. Mine are from last year’s harvest and my freezer since it is too early for local bell peppers. You might want to try some diced orange peel. This too is from my freezer saved from some of those huge oranges we were eating last winter. I like to slice and or dice or shred the peel before I freeze it. You may be surprised at how tasty this dish is cold the next day after the flavors have mingled.
BRAISED CABBAGE AND VEGETABLES
1 head cabbage, shredded
1 medium onion, chopped
1 bell pepper, chopped into ½ inch pieces
2 cloves garlic, chopped
1/4 cup olive oil
1 cup water or vegetable broth or chicken broth
Choice of seasoning: parsley, basil, caraway, celery seeds, dill, nutmeg, freshly ground pepper, or any seasoning mix you might prefer.
Add oil, onions, and bell pepper to a hot nonstick pan. Sauté for one minute. Add the garlic and stir once or twice. Add some of the cabbage and stir for 30 seconds. Add more and stir for 30 seconds and so forth until all of the cabbage is in the pan. Then add the liquid of your choice and cover the pan. Cook for ten minutes. Stir three or four times. Add more liquid if it becomes too dry. At end of cooking, the liquid should be mostly absorbed.

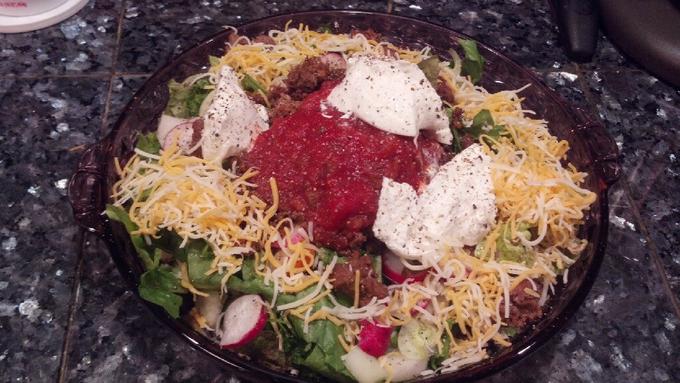
TACO SALAD
2 cups ground beef (or turkey or chicken)—1 pound+-
1 small Vidalia onion
1 package taco seasoning mix
Freshly ground pepper and salt
In a skillet brown the ground beef. Set aside to drain while sautéing the onion until it’s translucent. Then add the beef back into the pan with a package of taco seasoning mixed with water according to package directions. Add freshly ground pepper and salt, to taste. Set aside or
put in the refrigerator for tomorrow’s meal. When you are ready to have your taco salad “meal in a dish,” reheat the beef mixture and combine the following:
2 cups shredded cabbage—any variety: Napa, red, green
1 (7-ounce) can diced green chilies, if desired
1 cup diced tomatoes (or not, if you want to wait until ours are ready!)
Shredded Mexican cheese, to taste
For a dressing mix 1/2 cup sour cream of any variety and the desired amount of chunky salsa. You can eat this salad from a bowl or wrap it up or serve it in taco shells—whatever your family prefers.
COLESLAW SALAD
1 head cabbage, shredded
1 medium carrot, shredded
1 medium onion, chopped, if desired1/2 teaspoon celery seed
1/2 cup extra light olive oil
1/4 cup sugar
1/4 cup rice vinegar, unseasoned
1/2 teaspoon salt
1/2 teaspoon ground mustard
Freshly ground pepper, to taste
In a large bowl, toss cabbage, carrots and onion. Blend remaining ingredients until combined. Pour over cabbage mixture and toss to coat. Cover and refrigerate for at least
2 hours. Mix in 1 /4 chopped walnuts just before serving.
Variations: Add sliced almonds, chopped apple, citrus fruits, Craisins or raisins, black olives, or chopped zucchini or patty pan squash or bell peppers.* (*Peppers can be frozen from previous harvests and put into the mix frozen to thaw for a quick chill down of the entire salad.)
Option: Add dressing only the amount of salad you need for this meal. Store remainder of the salad in a bag. Toss with dressing when serving.
For a change from your favorite bottle dressing, try a simple drizzle of vinaigrette and/or olive oil. And top with roasted chicken, or the protein of your choice!
STUFFED CABBAGE ROLLS WITH APRICOTS
1 large head cabbage—flat heads are nice, but not necessary
1 pound ground chuck, browned and drained
1/3 cup brown or wild rice, raw, can use instant or regular
1 small onion, finely diced
2 eggs
1 tsp salt
1 tsp dried dill
1/4 tsp freshly ground pepper
1 large onion, sliced
1 large can (15 ounces) tomato sauce
3 cans (14.5 ounces each) plain, diced tomatoes
3 to 4 tsp lemon juice (juice of 1 large lemon)
1 tsp salt
1/4 tsp freshly ground pepper and ground ginger
1/2 cup brown sugar
1/2 cup dried apricots, diced
Remove about 15 large leaves from the cabbage; with a vegetable peel, shave off the very thickest part of each leaf. Scald these in boiling salt water just to wilt the leaves. Remove from water with tongs and place on towels to cool.
Combine ground chuck with the rice, diced onion, eggs, 1 tsp. salt, 1 tsp. dill, 1/4 tsp. pepper. Place about ¼ cup of meat mixture in cupped part of each softened cabbage leaf. Fold over sides of cabbage leaf; roll up. In bottom of a large casserole “stove-to-oven“ casserole or pan, place a few of the remaining leaves. Arrange layers of cabbage rolls, seam side down, and sliced onions in the casserole.
Mix tomato sauce, tomatoes, lemon juice, and the second 1 tsp. salt and 1/4 tsp. pepper and ginger. Pour over cabbage rolls. Sprinkle with brown sugar and diced apricots. The recipe freezes well at this point; or bake in a 350 degree oven, covered, for 45 minutes. Uncover & bake 45 minutes longer. Serves 4 – 6.
Variation: Substitute diced dates; or perhaps, Craisins for the apricots.
Variation: A quick casserole can be made by shredding the cabbage vs. stuffing and rolling the leaves. This is better for smaller heads of cabbage.
If you run short on meat filling or if you want a vegetarian dish substitute diced, steamed zucchini, diced onion, and grated orange peel for the cabbage leaf filling.
FYI: Heads of cabbage last for several weeks in the refrigerator when securely wrapped in plastic wrap or aluminum foil. Of course, the longer you store it, the more it may taste like “store bought” than “fresh from the garden.”
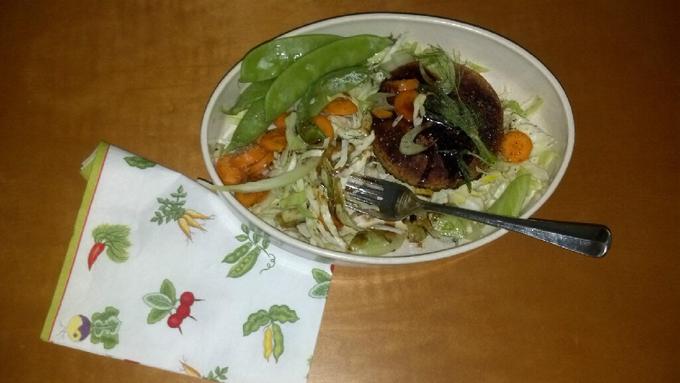
CABBAGE SALAD
Cabbage is not just for coleslaw! This salad of shredded cabbage is a hearty substitute for a lettuce salad. An almond burger adds protein to the meal. Snow peas are the garnish. An entire head can be shredded and served up from an air-tight bag as needed.
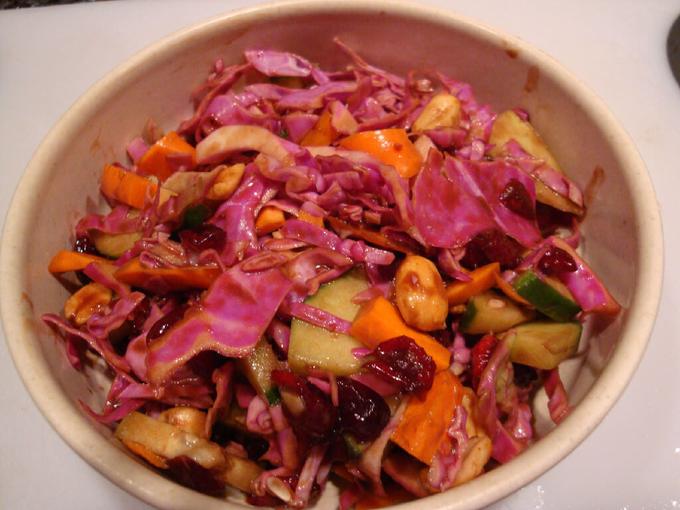
PEANUT SLAW
Toss together:
Cabbage–shredded or cut into small strips
Julienne-cut carrots
Golden Raisins or Craisins–whichever you have one hand
Dry roasted peanuts–salted, unsalted–your choice
Peanut dressing (follows)
PEANUT SLAW DRESSING
Equal parts balsamic vinaigrette and House Of Tsang’s Bangkok Pedang Peanut Sauce–or other peanut sauce. If you want more spice then use more peanut sauce.
Make a day ahead or serve immediately. Or simply plan to make enough today for tomorrow’s meal.
This recipe came from a CSA Member friend and is new to us, but rapidly becoming a favorite in our household. The salad is great the first day, but sitting overnight blends the flavors even more! The peanuts do not get soft–just infused with the flavors! I toss cucumbers into mine, too.
FREEZER SLAW
1 head cabbage, shredded
1 carrot, grated
l green pepper, chopped
1 cup vinegar
¼ cup water
1 tsp. whole mustard seed
1 tsp. celery seed
1 1/3 cups sugar
Mix 1 tsp salt with shredded cabbage, let stand one hour. Squeeze excess moisture from cabbage. Add carrot and green pepper.
In a sauce pan mix vinegar, water, mustard seed, celery seed, sugar and boil one minute. Cool to lukewarm, pour over cabbage, mix & serve. Or refrigerate slaw and eat cold. Or freeze slaw in an air tight freezer bag or container.
Yield: 1 ½ – 2 quarts.
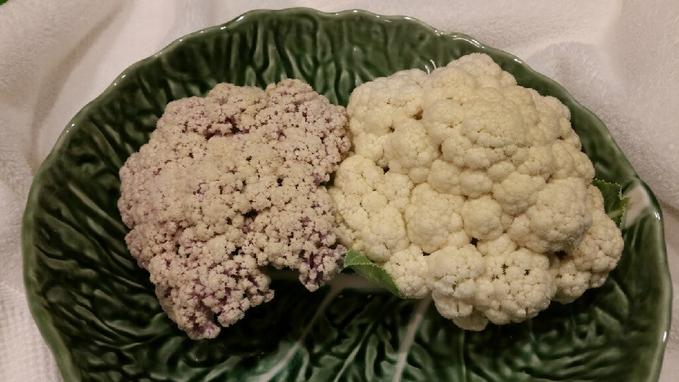
CAULIFLOWER SOUP
Sorry, I do not have an actual recipe for this soup! But I did start with the “Cream of Anything Soup” recipe which you can find under “S” for Soup. I recall that I did add a few potatoes and cauliflower left over from the night before which I first pureed. I also added some shredded cheddar cheese. I topped this delicious soup off with some tiny cauliflower florets which had been blanched for just three minutes so they still had the “crunch” in them.

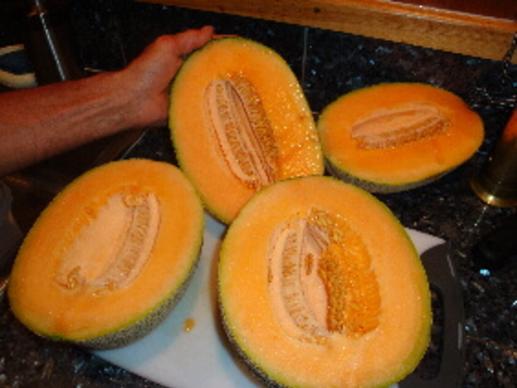
CANTALOUPE
What’s not to love about “melon in season”! You do need to eat or cut, seed, and refrigerate our cantaloupes as soon as you receive them, however. They will rapidly turn to mush if you leave them sitting out on the counter as these are vine ripened!
We love them peeled and plain! Or, just cut in half, seeded, and filled with rich vanilla ice cream! Or, with a scoop of vanilla yogurt! Or, add juicy blueberries or strawberries—or some combination of the above!
CANTALOUPE SOUP
2 cups ripe cantaloupe, cut into 1-inch pieces
2 cups watermelon, cut into 1-inch pieces
Juice of 1 lemon
1 tsp honey
1/4 tsp salt
1 jalapeno pepper, seeded and minced (wear gloves to do this!)
1/4 cup blueberries
Puree the melon in a blender. Add all other ingredients EXCEPT the blueberries. Chill for at least 3 hours. Garnish with fresh blueberries before service.
Robert likes his soups hot; so I use this recipe as a healthy dessert!

CANTALOUPE & HONEYDEW YIN-YAN SOUP From WLOS TV and by The Corner Kitchen
Ingredients:
1 each cantaloupe
To taste: heavy cream
Ta taste: lemon juice a pinch of salt
1 each honeydew
To taste: heavy cream
To taste: lime juice a pinch of salt
Fresh ginger
Directions:
(Two different soups!) For each soup, clean and chop the melon. Puree and add the cream.
For the ginger cream: Puree a handful of ginger and strain it for the juice. Make a little whipped cream with the ginger juice.
CARROT REMINDER:
To store carrots, beets, kohlrabi, and fennel cut off the leaves about one inch ABOVE the top because when stored in the refrigerator the leafy greens will draw the moisture from the root greatly reducing the flavor and, eventually, causing the veggie to which they are attached to become rubbery. Of course, it is much better to eat than to “store” your CSA veggies!
And speaking of “veggie tops,” do not discard those leaves filled with flavor and nutritional value! Beet tops can be sauteed and served alone or mixed into soups for an Earthy flavor. Kohlrabi leaves will need to be braised a bit longer due to the dense texture, but shredding or finely slicing the leaves is good place to begin. They will add both flavor and fiber to dishes. Fennel tops can be mixed into soups or stews or even sour cream (our family favorite use). Early carrot tops greens make a great pesto with an unexpected flavor. For a pesto recipe, skip to the bottom of this page to the Roasted Eggplant Pesto and substitute the carrot tops for the eggplant!

CORN ON COB WITH HUSKS—QUICK & EASY IN THE MICROWAVE
Cut off the floppy silks on top of the husks, but do not remove the husk.
Wet both papers towels and squeeze out the water then wrap each husk with a double layer of damp paper towels.
Spread out ears in the microwave.
Microwave for 1-1/2 (minutes for one ear) on HIGH, turn the corn onto it’s other side and continue to cook for another 1-1/2 minutes (feel the ear to be sure they are very hot).
(Microwave 2 minutes for two ears.)
Using a towel carefully remove from microwave and let sit for 5 minutes before removing the husks and silks, the silks will slide off like magic. Corn will be very hot!).
Of course, microwaves will vary in power, so experiment with yours. Or else, put on a big pot of water and bring it to a boil—but only blanch the ears of corn. Sweet corn needs only to be heated through and it is ready.

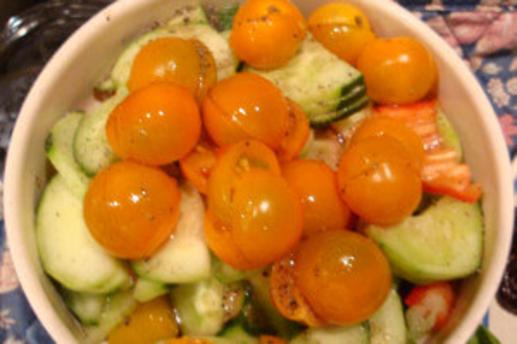
CUCUMBER SALAD
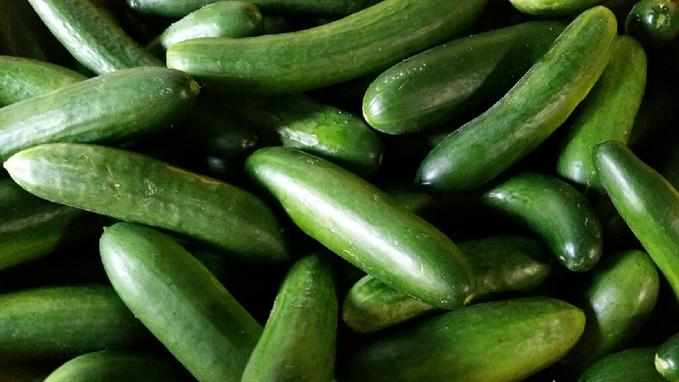
Wash cucumbers and trim ends. Using a vegetable peeler, make stripes down the length of the cucumber by removing strips of peeling. (Do not remove all of the peeling. These cucumbers have not been waxed!) Slice or cube the cucumbers as desired. Chop some sweet onion, green pepper (later, red and yellow!) and fresh parsley.
In a large bowl, toss the mixture with the dressing to coat. Cover and refrigerate for two hours for best flavor.
Dressing:
1/4 cup extra light olive oil
1/4 cup rice vinegar
1/4 cup sugar or Stevia
1/2 tsp. celery seed
1/2 tsp. salt
1/2 tsp ground mustard
Freshly ground pepper, to taste
When ready to serve, remove from the refrigerator allowing to set at room temperature until the olive oil returns to its natural state. This refreshing salad will stay crisp for 2 – 3 days. Toss in fresh tomatoes when serving!
CUCUMBERS IN SOUR CREAM
Wash cucumbers and trim ends. Using a vegetable peeler, make stripes down the length of the cucumber by removing strips of peeling. (Do not remove all of the peeling. These cucumbers have not been waxed!) Thinly slice the cucumbers. Thinly slice a sweet onion, if desired.
In a large bowl, toss the mixture with the dressing to coat. Cover and refrigerate at least two hours for best flavor.
Dressing:
1 cup sour cream
3 TBSP Rice Vinegar or flavored vinegar (ie: strawberry!)
1 – 2 TBSP sugar or honey
Freshly ground pepper
Dash salt
CUCUMBER SOUP
2 – 4 cucumbers, totally peeled or just striped
1 TBSP onion, diced
2 TBSP lemon juice
1 cup chicken or vegetable broth
1 cup cream or buttermilk
Fresh chives or parsley, minced
Chop the cucumbers into large pieces, reserving 1 – 3 slices per bowl as a garnish. Blend cucumber with other ingredients. Cover & chill for 3 hours.
Served in chilled bowls. Garnish the tops with three overlapped cucumber slices and a sprinkling of herbs.
QUICK PICKLES
2 -3 Cukes (thinly sliced)
1 small onion (thinly sliced)
2 cups white vinegar
1 teaspoon sugar
2 tsp. pickling spice –OR —
1 tsp fennel seeds + 1 tsp coriander
Combine the vinegar, sugar, and spices in a pan and bring to a boil. Pour over the sliced cukes and onion. Allow to sit until the liquid is at room temperature. Strain and serve. Or, pour all of the ingredients into a jar and refrigerate for later use.
WHITE GAZPACHO
4 medium cucumbers, peeled, and roughly chopped
2 cloves garlic, crushed
3 cups chicken stock
2 cups sour cream, light if desired
2 tsp salt
¼ cup freshly squeezed lemon juice
Chopped tomatoes and parsley and walnuts, for garnishes.
Blend 2 cucumbers, 1 clove garlic, and 1/2 cup stock. Blend until smooth. Transfer to a large bowl. Blend the remaining 2 cucumbers, clove of garlic, and 1/2 cup stock until smooth; add to bowl.
Whisk in the remaining 2 cups stock and the sour cream, salt, and lemon juice. Cover, and chill in refrigerator for at least 1 hour. Place tomatoes, parsley, and walnuts in separate bowls. Ladle soup into bowls, and garnish with desired condiments.
Makes 8 – 10 servings.
QUICK & EASY TOMATO BASIL GAZPACHO
Open one can of Organic Tomato Basil Soup. Pour into blender.
Wash one to three cucumbers, depending on taste, cucumber size and the number you have available. Cut off the stem end. It is not necessary to peel, but you may do so to remove the bits of dark green from the soup mixture.
Put cuke(s) into the blender with canned soup. Add 2 -3 fresh basil leaves and 1 – 2 TBSP of fresh lemon juice. ress the button to dice, chop, or puree, depending on your taste.
Pour mixture into chilled bowls and serve. Garnish with a basil leaf and a ground of garlic and/or black pepper, if desired!
The soup may also be served warm.

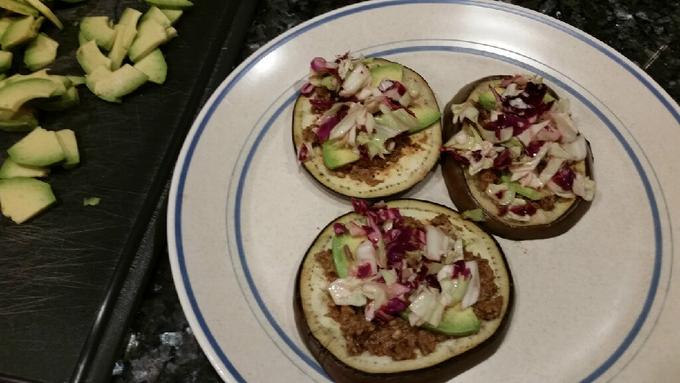
VEGAN EGGPLANT TACOS
When I first told Robert about these, he was skeptical to say the least; but he was a convert after tasting! I am going to include the full unedited recipe. I will say that I used lemon juice because I did not have lime juice and I had no coconut aminos or cilantro to garnish—they were wonderful just the same. All chefs know how to work with what they have! I did toast the eggplant rounds.
Bigger eggplant make “fold-over tacos” while the Asian eggplant slices make only a bite or two—but just as tasty. My refrig now has coconut aminos and I restocked my pantry with sun-dried tomatoes in anticipation of the next batch. FYI, they are even good cold the next day if you are fortunately enough to have any leftovers!

RAW VEGAN EGGPLANT TACOS . . . . by Merce Muse for Thrive Market
Yield: 20 mini tacos
Active Time: 20 minutes
Total Time: 30 minutes
Walnut Taco Filling:
1 cup walnuts
3/4 cup sun-dried tomatoes, soaked in boiling water 10 minutes
1 tablespoon coconut aminos
1 tablespoon apple cider vinegar
1 teaspoon ground cumin
1/2 teaspoon chili powder
1/2 teaspoon smoked paprika
Pinch cayenne pepper
1/2 teaspoon onion powder
1/2 teaspoon garlic powder
1 teaspoon salt
1 to 2 large eggplants rounds
1/2 red cabbage, thinly sliced
Juice of 2 limes
Salt, to taste
1 avocado, thinly sliced
Cilantro, to garnish
Place walnuts, sun-dried tomatoes, coconut aminos, vinegar, spices, and salt in the bowl of a food processor and process until roughly combined and resembles the texture of ground meat, adding in a little water if necessary.
Slice eggplants into 1/4-inch sized rounds. Heat a skillet over medium-high heat. Working in batches, place sliced eggplant in dry skillet, and toast 30 seconds to 1 minute each side, so that the eggplant softens slightly and becomes golden brown in color.
In a small bowl, toss together cabbage with lime juice and salt.
To assemble tacos, top toasted eggplant with desired amount of walnut filling, red cabbage, and avocado. Garnish with cilantro leaves.
ROBERT’S QUICK AND EASY EGGPLANT PARMESAN
Wash and slice available eggplant into 3/4 inch round slices or oblong slices, as you like. Place in a single layer in a 9 x 13 casserole dish which has been sprayed with Pam. Sprinkle with Chef Paul Prudhomme’s Herbal seasoning, or seasoning of your choice.
Top each slice with a light layer of Italian bread crumbs. Top each slice with a dollop of Earth Balance. Bake in a 400 degree oven until golden brown—perhaps 50 minutes until the eggplant “looks cooked”—beyond fork tender.

Remove from the oven. Top each eggplant slice with marinara sauce—whatever amount it takes to cover the slice. Return to the oven and bake another 10 minutes to heat the sauce.

Remove from the oven and sprinkle mozzarella cheese on each eggplant slice. They will be hot enough to melt the cheese adequately.
This recipe makes an excellent hot appetizer or side dish. Cold slices are exceptional when placed on top of a bowl of plain yogurt! If you have large eggplant slices, they are tasty served hot or cold as “eggplant pizzas!”
NOTE: Slice the eggplant thinner, if you like; just vary the cooking time accordingly. The thickness you use may depend upon the amount of eggplant and the cooking time you have available. Some people just prefer the “crispy” eggplant chips one gets from thinner slices.
Or, if you are not a tomato sauce/marinara fan, just put the cheese directly on the slices totally omitting the tomato sauce step!
If you have any leftovers, they make a quick lunch as they are just as good cold as hot! Or, you can chop the rounds and mix them into wild rice as a side dish. Or, you can pulse them in a food processor to make a spread for pita bread or chips. Or, you can make an eggplant sandwich! If you have any leftovers, that is . . .
NOTE: We layer cooked slices into a freezer container and freeze them so we can have Eggplant Parmesan with pasta next winter!
STUFFED EGGPLANT WITH PEPPERS
Traditional eggplant
Olive oil cooking spray
1 -3 tomatoes, depending on how many eggplant
2 medium onions
1 -2 sweet bell peppers
Salt, pepper
Whole black olives, if desired
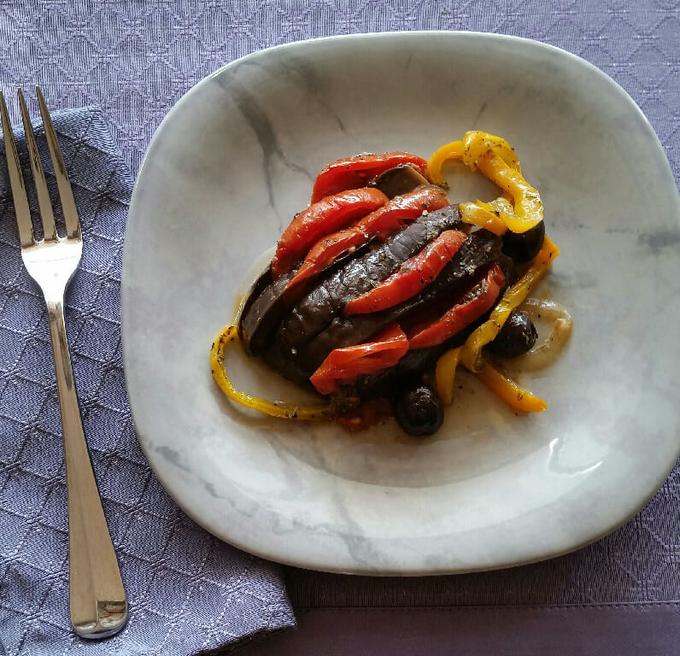
Cut off the stem and cut the eggplant in half long-wise. I make three or four “through” slits to fan each half but leave the butt end uncut. Stuff a wedge of tomato into each slit, and very carefully placed the eggplant on a bed of sliced onions in baking dish which has been coated with olive oil.
Sliced a sweet bell pepper and another onion to layer across the top. Sprinkled salt and pepper, drizzled with olive oil, and tossed in a few black olives, if desired.

Covered the entire dish with foil and baked for 20 minutes at 425 degrees; then another 25 minutes at 350 degrees. When the eggplant is fork tender at the butt, the dish is done.
NOTE: This is good warm, but we like it cold even better! The eggplant halves look pretty sitting on top of a pile of spaghetti squash—but then so do meatballs! Make it and the squash a day ahead for a delicious meal!
NOTE: Also, I think, this recipe would work great for a big zucchini or patty pan squash. However, as our CSA Members already know, we always attempt to harvest our veggies before they get too large!
EGGPLANT WITH YOGURT
2 medium eggplant (or cut recipe in half for one eggplant)
Olive oil cooking spray
1 small (8 oz.) can tomato sauce
1 14 ½ oz. can diced tomatoes, seasoned (Del Monte Garlic and Balsamic Vinegar)
1 TBSP olive oil
8 oz. plain yogurt
Simmer for 10 minutes the tomato sauce, diced tomatoes, olive oil and salt and pepper, to taste. Set mixture aside to cool. Meanwhile, slice eggplant into ½ inch pieces.
Preheat broiler. Place eggplant slices in single layer on a cookie sheet. Spray with olive oil and broil to medium brown. Turn over, spray and broil the other side. In a serving dish (or on individual plates) place a single layer of eggplant, spoon yogurt on top to almost cover each individual piece. Then cover well with tomato sauce mixture. Garnish with chopped black olives or chopped fresh basil, if desired.
This can be served warm or cold!
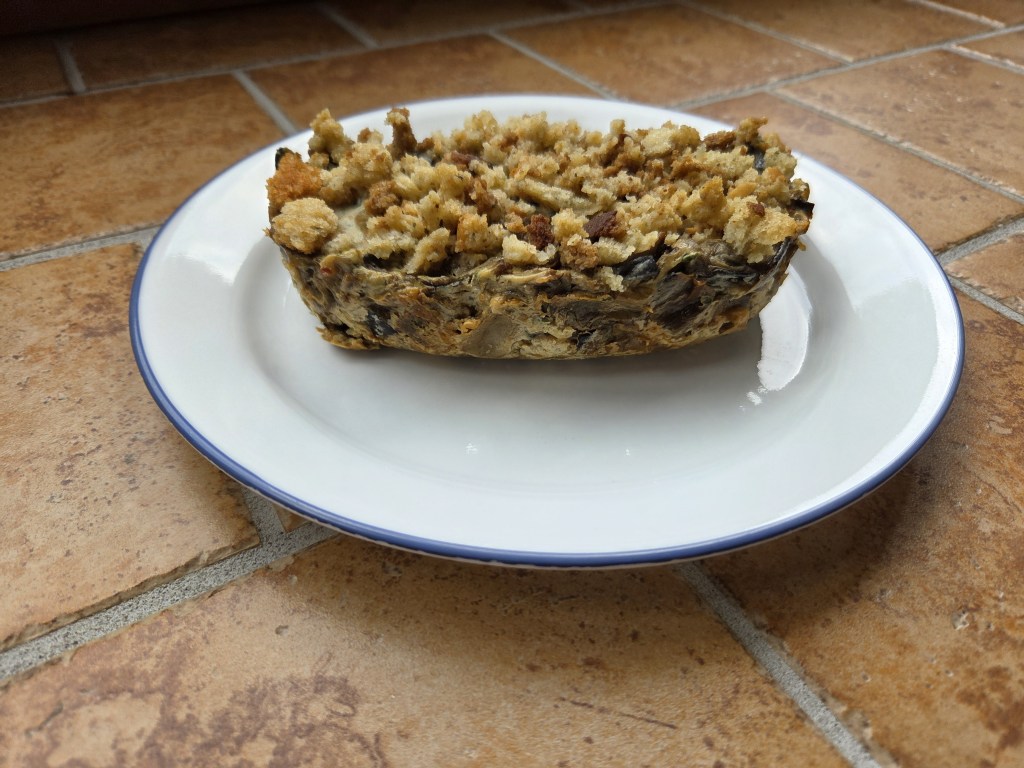
EGGPLANT BREAD
An adventurous CSA Member emails me that she substitutes eggplant for zucchini in her zucchini bread recipe. She says it produces delicious results. Apparently her family, who is not as fond of eggplant as Robert and I.
EGGPLANT CHILIES RELLENOS
1 pound of eggplant, chopped into large bite-size
1 medium onion, chopped
2 eggs
3 – 6 TBSP chopped canned green chilies (4 oz. can)
1/2 cup red or orange bell pepper, finely chopped
1 clove garlic, diced
3/4 cup shredded Cheddar cheese
3/4 cup shredded Mozzarella cheese
1/3 cup herbal dressing mix in 1 TBSP melted butter
Toss eggplant and, separately onion and bell pepper, in olive oil with salt and pepper. Roast about 12 minutes in convection oven at 375 degrees until tender.
Combine eggs, green chilies, garlic, and cheeses in a mixing bowl. Stir. Add eggplant & onion & pepper to the mixture. Stir well.
Spoon the mixture into a greased 1 ½ -quart casserole. Combine herbal dressing mix and butter; sprinkle over casserole. Bake at 375 for 45 minutes or until knife inserted comes out clean. This recipe freezes well.
NOTE: Roasting the eggplant will reduce the weight and volume by about half because you are removing all of the moisture—but adding so much more flavor than if you just “boil” the eggplant!
ROASTED EGGPLANT PESTO
2 to 3 cloves garlic, peeled & minced
3/4 cup packed eggplant pulp, roasted
1/6 cup chopped pine nuts or walnuts
1/4 cup extra virgin olive oil
2 TBSP lemon juice
1/4 cup grated Parmesan cheese
Puree the garlic, roasted eggplant, and nuts together in a food processor. Blend in the oil and cheese, forming a paste. Serve; or freeze pesto portions in your cupcake baking tin or ice cube trays for future use. Once the pesto portions are frozen, pop them out of the tin or tray & put into a freezer bag.
Pesto is good on pastas, on sautéed squash and zucchini and a variety of winter squashes. (See our Ratatouille recipe). You can also mix it into sour cream or cream cheese or butter and served with bread or crackers.

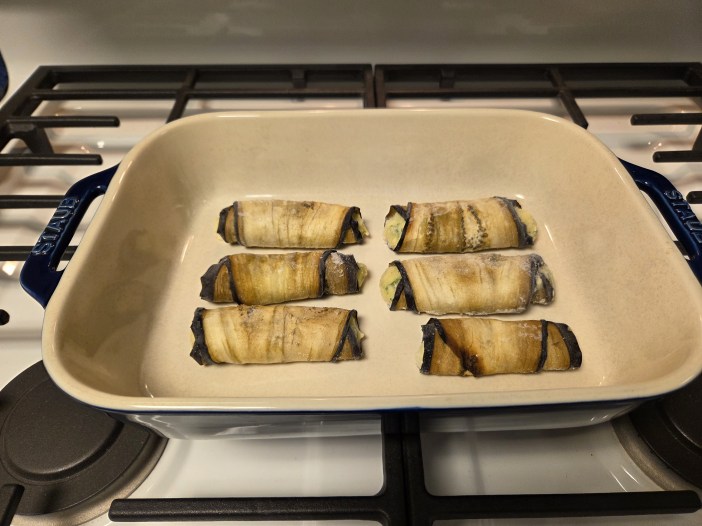
EGGPLANT ROLLATINI
Slice globe eggplant lengthwise to about ¼-inch slices. Arrange one layer on a parchment lined baking sheet. Brush with olive oil, salt, pepper.
Bake slices until golden brown at 375 degrees in a convection oven for about 22 minutes.
Meanwhile, whisk the following for the Ricotta Cheese Stuffing:
12 ounces ricotta cheese
1/2 cup shredded parmesan cheese
1 large egg
1 garlic clove, grated or chopped finely
2 -3 TBS fresh basil leaves, chopped
1/2 tsp salt
1/4 tsp. freshly ground black pepper
Spoon a heaping tablespoon of the ricotta mixture onto the base of an eggplant slice. Starting at the base, roll the eggplant slice up to make a mini-crescent roll. Arrange on a parchment lined baking sheet with the seam-side down to prevent unrolling. Rollatinis can be frozen individually and bagged for later use.
Or, arrange in a greased baking dish and top with a quality tomato basil sauce or marinara and bake until the sauce is bubbling (and the egg is cooked) or about 15 – 20 minutes. Enjoy now or later as a main dish, side dish, or elegant appetizer!
NOTE: Any leftover roasted ends and pieces to small to roll can be used to lasagna-like layer with the Ricotta Cheese Sauce and sauteed mushrooms and mozzarella to make an Eggplant Casserole. Waste not; want not!
